2026-05-13
Building VeryContent: From TikTok Transcripts to MarkdownBlog Posts
I helped my friend Dom with a task he's been putting off for some time - transcribing all his TikTok videos to Markdown blog posts. He has around ~400 videos to transcribe.
One of the biggest blockers for solo creators is not ideas, it is the blank page. You have already said the thing, said it on video, off the cuff, probably pretty well, but sitting down to write a 600-word blog post from scratch feels like a completely different and considerably harder task, and so it keeps getting put off in favour of things that feel more urgent.
VeryContent is a small tool built to close that gap.
The Problem
Dom has hundreds of short-form videos, TikToks mostly, where he's shared ideas about helping developers build and monetise products. The ideas are good and they are well expressed, but turning them into long-form content like blog posts, LinkedIn articles, or essays is always a separate creative effort that kept sliding down the priority list, because starting from a blank page after a full week of client work is genuinely difficult.
The hypothesis was straightforward: if those videos could be transcribed automatically and used as raw material, the blank page problem disappears entirely, because you are no longer starting from nothing. You are editing and shaping something that already exists, which is a much easier creative task than conjuring something from scratch.
What We Built
VeryContent is a local web application with no cloud dependencies, no subscriptions, and no sending your content off to someone else's server. You run it on your own machine, and everything stays on your own machine.
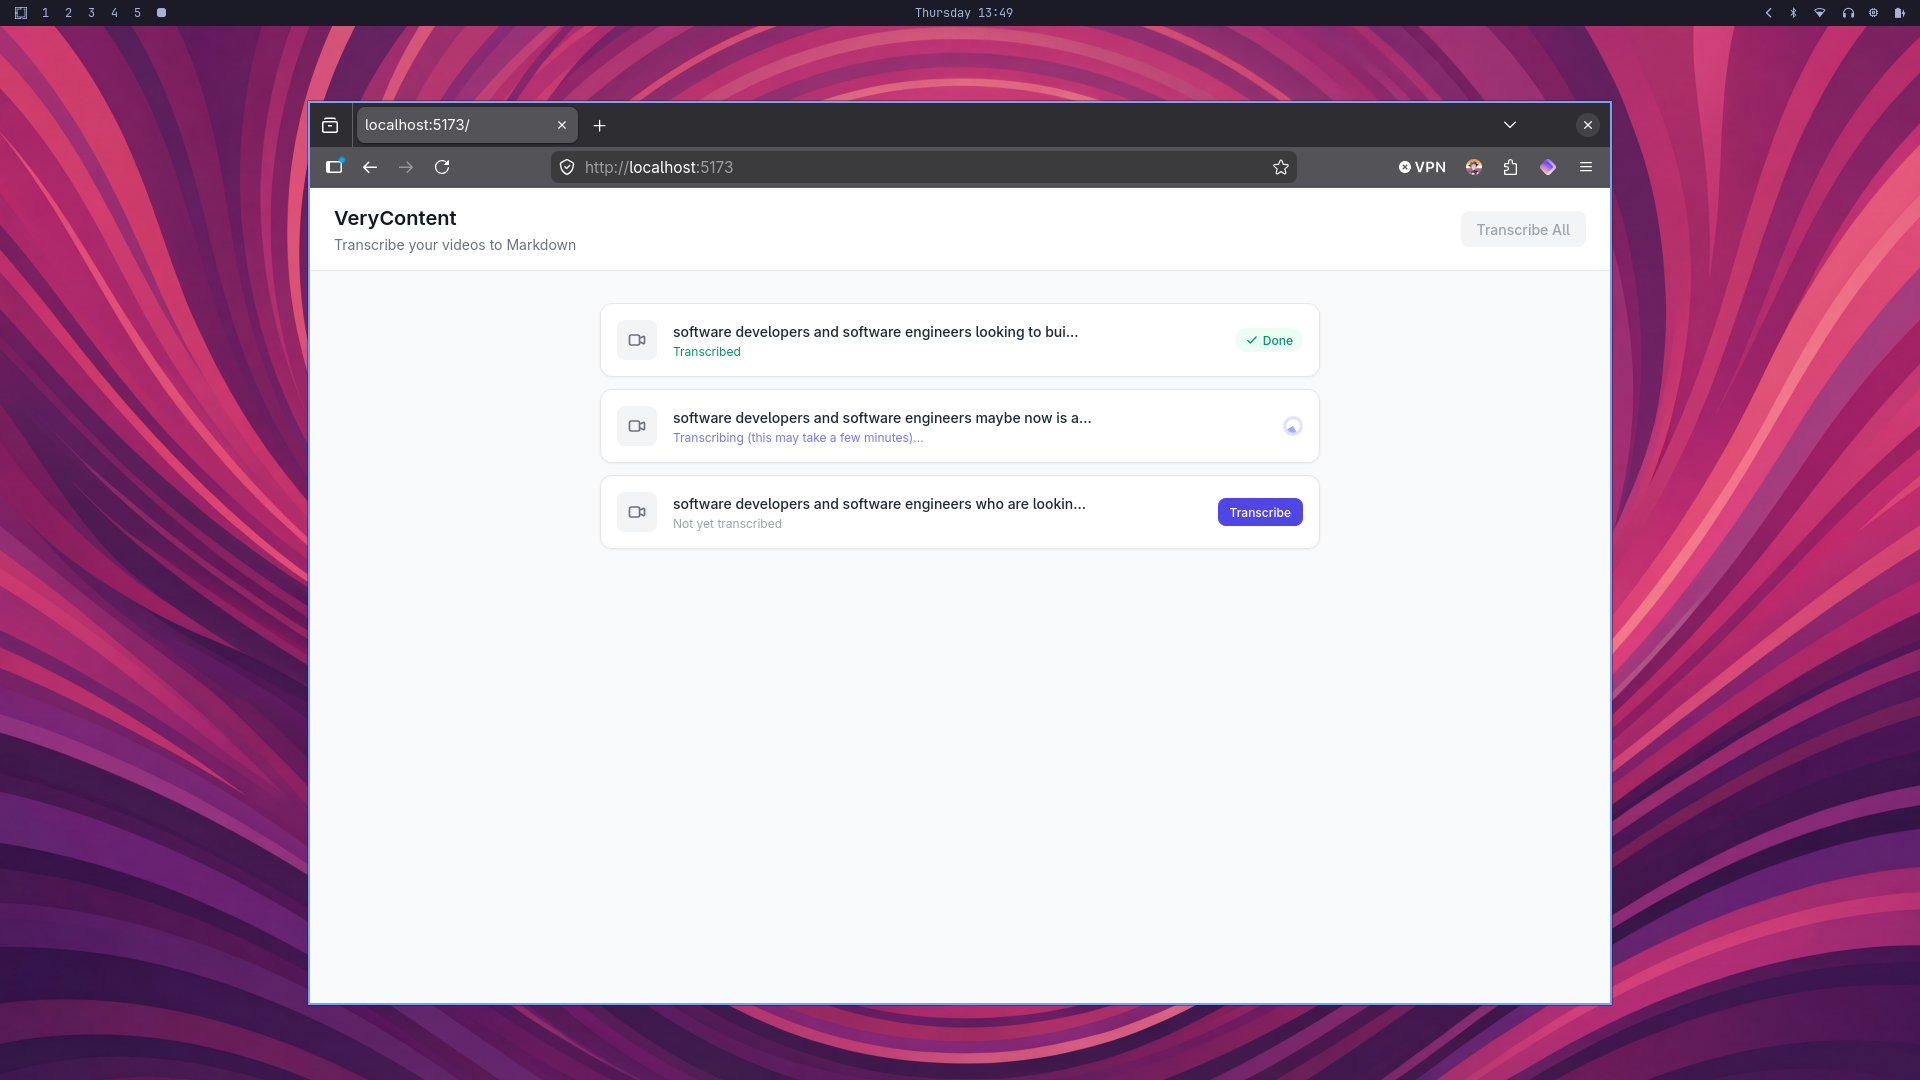
The stack is built around SvelteKit for the frontend and server, Tailwind CSS for styling, the Whisper speech-to-text model running locally via the @xenova/transformers library, and ffmpeg for extracting audio from video files. You drop your videos into the test-videos/ folder, open the app in a browser, and click Transcribe. The app pulls the audio out of each video, runs it through Whisper, and saves a Markdown transcript file alongside the original. You can work through them one at a time or hit Transcribe All and let it run in the background while you get on with something else.
The Technical Decisions
A few choices were made deliberately and are worth explaining.
Everything runs locally, which means there is no API call to OpenAI, no uploading footage anywhere, and no ongoing cost beyond the electricity. The Whisper model downloads once at around 74 megabytes and runs on the CPU from that point forward. It is slower than a cloud API, but it is private, free to run, and works without an internet connection.
The output format is Markdown, which was always the intention, because the goal was for these transcripts to slot straight into a text-based writing workflow without any export steps or format conversions getting in the way.
The whisper-base.en model was chosen over the smaller tiny variant because the accuracy difference is meaningful enough for spoken content that includes domain-specific vocabulary, though swapping between the two is a single-line change in the source if speed becomes the priority.
Progress streams back to the browser in real time using Server-Sent Events, so rather than watching a frozen UI and wondering whether anything is actually happening, you can see exactly what stage the process is at as it moves from extracting audio through to writing the finished transcript.
From Transcripts to Blog Posts
To test the full pipeline, three videos were transcribed and the resulting transcripts were used to draft a blog post.
The videos covered a developer who had spent two years building without ever shipping and what that reveals about the importance of understanding your audience, the growing sense of disconnection people feel from social media interfaces and what that opportunity means for niche builders, and the reason marketing consistency compounds in a way that bursts of effort simply do not. Each one was a sixty-second spoken thought, and together they became a structured post with a clear argument and a hook that is ready to use. That is the whole point of the tool: the ideas were already there, fully formed, and they just needed a format to live in.
What's Next — and What We Built Next
After getting transcription working, the obvious question was what to do with the transcripts. The original hypothesis was that having raw material would remove the blank page problem, but there was still a gap between a rough transcript and a usable blog post draft. So we kept building.
The Blog Assistant
The second phase added a chat interface in the bottom-right corner of the app. It connects to the Gemini API and is given the full contents of every transcript as context, along with a blog post template we wrote to capture Dom's voice and structure. You can ask it things like "find a common theme across all the transcriptions and write a blog post" and it will stream a structured draft back in real time.
The template is not there to produce finished articles. The goal is the same as it was with the transcription step: get something on the page that Dom can edit rather than stare at a cursor. The model follows his tone, uses British English, writes in narrative rather than bullet points, and avoids the habits that make AI writing feel hollow.
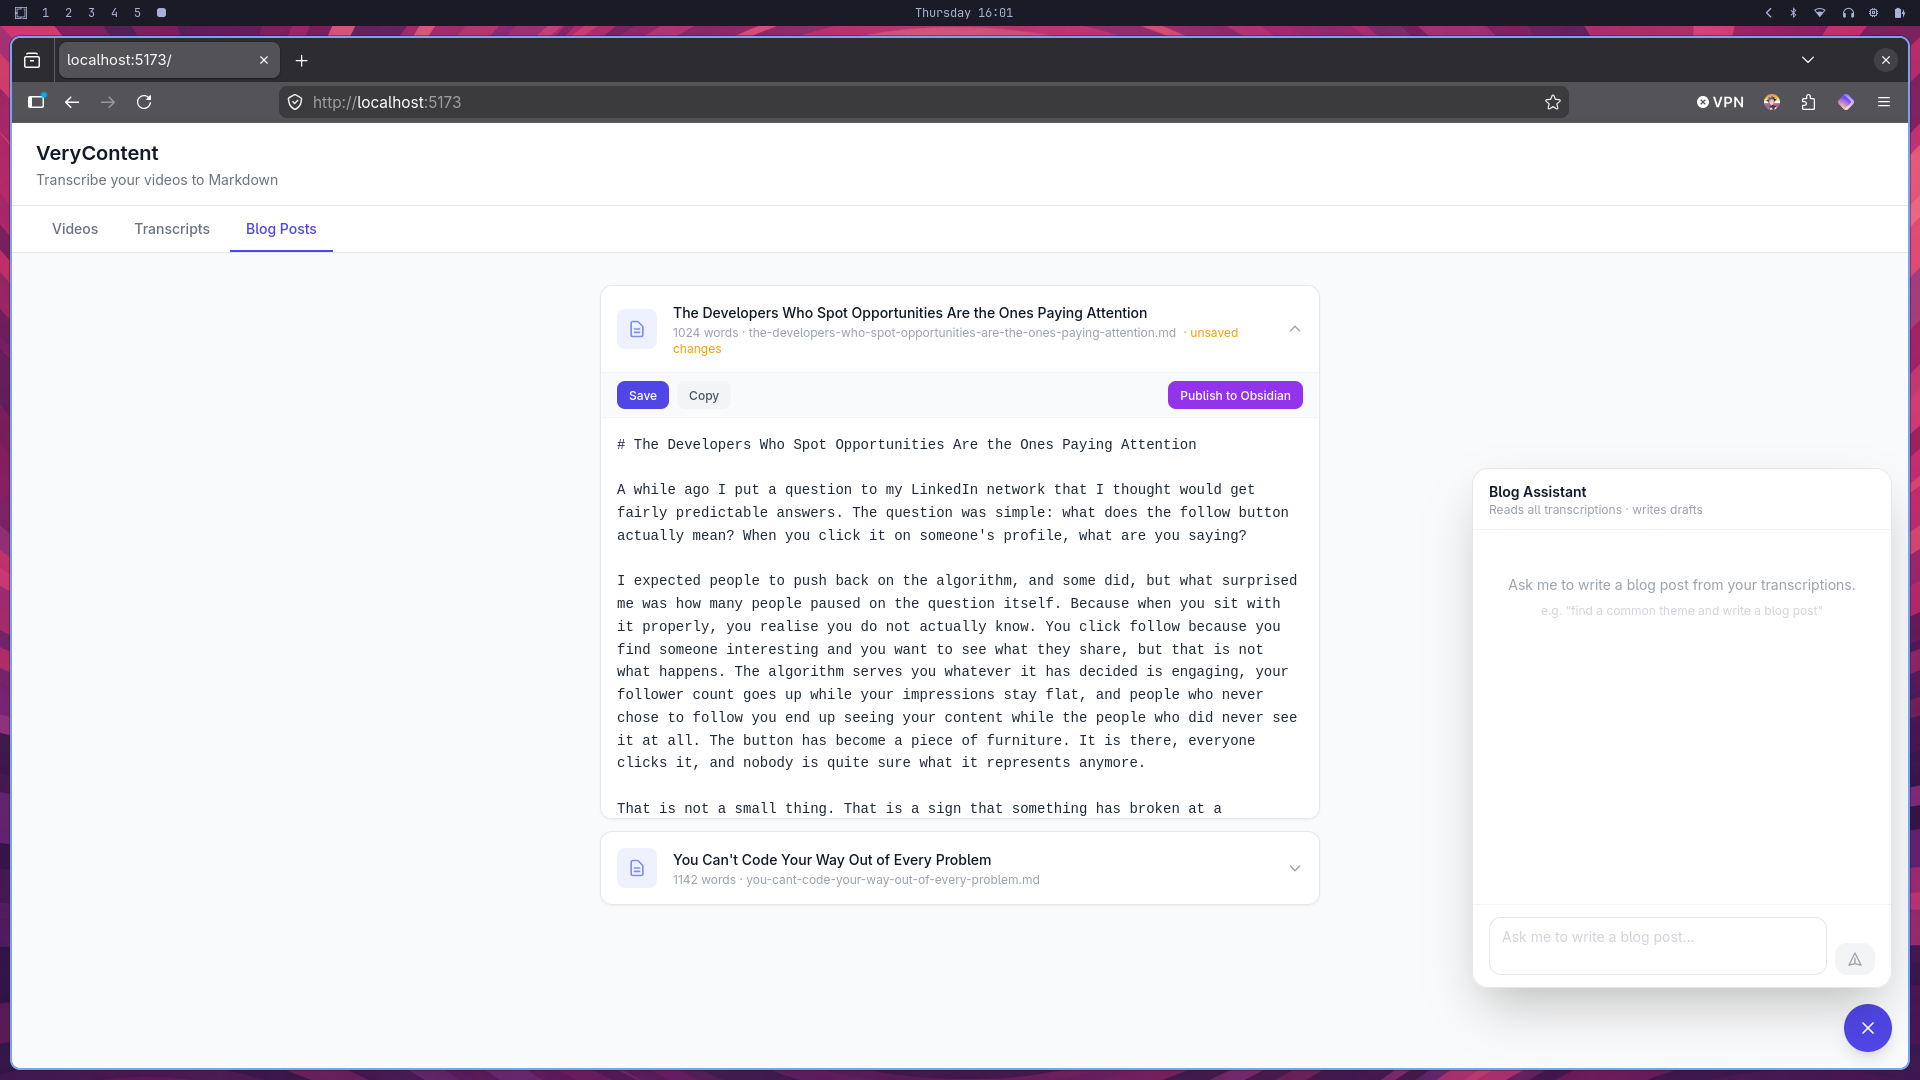
When a response looks usable, a Save as Blog Post button appears beneath it. You confirm a title, and the post is written to a blog-posts/ folder and immediately appears in the Blog Posts tab.
Editing and Publishing
The Blog Posts tab is where the drafts live. Each one opens into a monospaced editable textarea so Dom can make changes directly in the app without opening a separate editor. An unsaved changes indicator appears in the header while editing, and a Save button writes the changes back to disk.
Once a post is in good shape there are two ways to move it forward. The Copy button puts the full Markdown content on the clipboard so it can be pasted anywhere. The Publish to Obsidian button copies the file directly into the configured Obsidian vault, into a subfolder called Blog Posts by default. Both work on the current content of the editor, so you can copy or publish without saving first if you want to keep the file on disk unchanged.
Configuring Obsidian publishing is a single line in the .env file: set OBSIDIAN_VAULT_PATH to the path of the vault and the button does the rest.
The Full Workflow
The Sunday batch workflow we set out to build is now complete. Transcribe in the morning, ask the assistant to find themes and generate drafts in the afternoon, edit in the app, and publish directly to Obsidian in the evening — without opening a blank document at any point in the process.